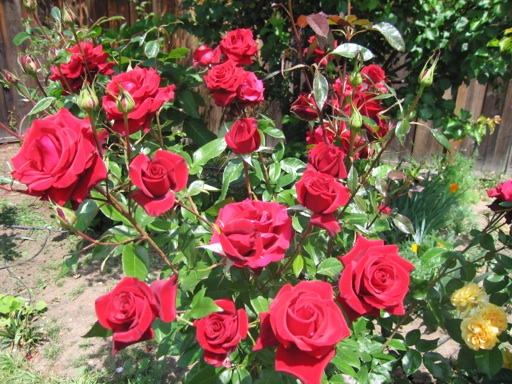
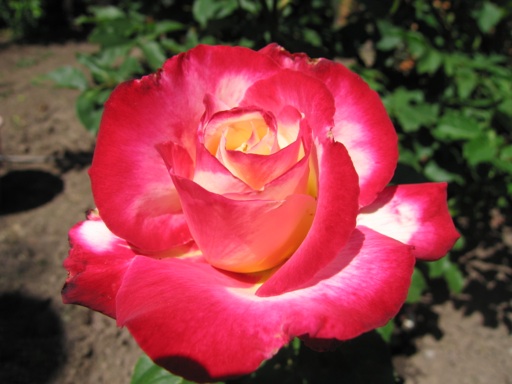
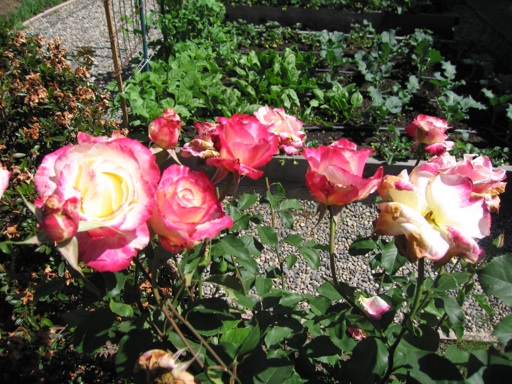
Our roses starting blooming in late March this year, which is earlier then I remember them blooming in the past by a few weeks. Our black magic (red) roses are particularly beautiful this year (first picture). The flowers last a very long time but have no fragrance. Our double delight roses were also amazing (second and third photos). They are very fragrant but the flowers are more ephemeral.
May 04 2014 | Roses | Comments Off on More Black Magic
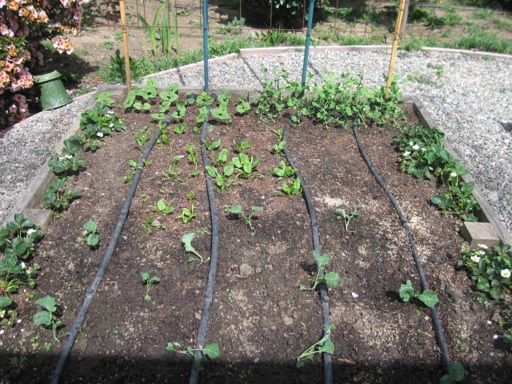
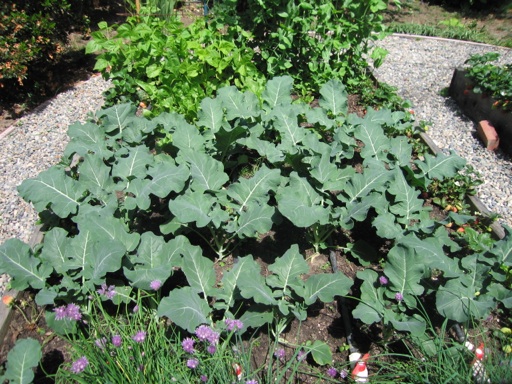
I planted broccoli seeds in peat pots the last week of February this year. I germinated them in our new portable greenhouse. I transplanted the seedlings into raised beds a few weeks later. The first picture above was taken in late March after I transplanted the seedlings. They have now grown into plants that are over a foot tall. The second picture of the same plants was taken a week ago. There is still no sign of any crowns developing yet. Although, I except them to develop crowns by the end of May. Hopefully, the plants will be big enough by then to support large broccoli crowns.
An important point regarding growing broccoli is timing the plantings so that most of the plants’ growth occurs when the high temperatures are between about 62 and 75 degrees F, which is their ideal temperature range. You have to have a good idea of the average spring temperatures in your area and time the plantings appropriately. This is the first time I have planted broccoli by seed. Previously, I planted transplants that I bought from a local nursery, which were typically available mid to late March. Those previously broccoli plantings developed crowns in late May and early June. I based my timing of planting the seeds in late Feb. to try to duplicate this timing. I am assuming about 90 days between planting the seeds and harvest time.
May 04 2014 | Broccoli | Comments Off on Broccoli By Seed
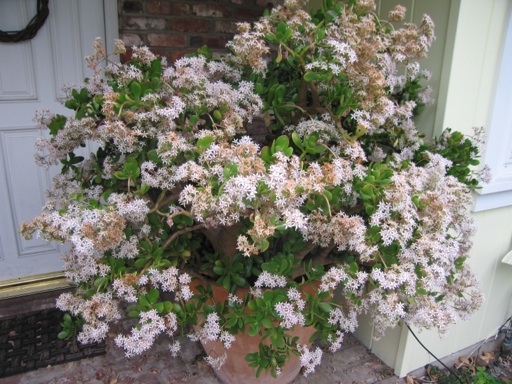
I haven’t blogged about our jade plant in nearly 5 years. I transplanted our jade into a clay pot under a shady porch about 6 years ago. It has probably quadrupled in size since then as can be seen by comparing this photo to the photo in my last post about it in 2009.
Our jade plant is full of flowers right now. Last winter, it bloomed for the first time. This winter, it started blooming in December and is still going nearly two months later. Nothing else is blooming in our area now, except for a few early blooming trees.
We give our jade plant used coffee grounds as fertilizer about twice a month. It seems to like the coffee grounds. Jade needs relatively little water and seems to like being in shade. In winter, it gets afternoon sun, because the porch it sits on faces south. But the porch shades it most of the day in spring and summer.
February 09 2014 | Jade | Comments Off on Jade Plant in Bloom
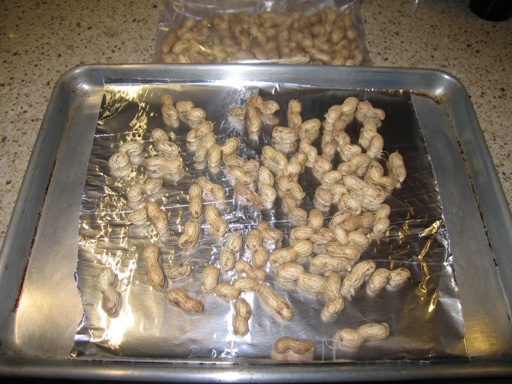
Last month, I dug up the Virginia peanut plants I had been growing in our vegetable garden since last April. I grew 11 peanut plants by seed. Each plant had about 10 peanut shells growing on them underground. After removing the peanuts from the plants, I left the peanuts outdoors in a sunny spot on a table for about 10 days to dry. I also covered them with bird netting to discourage pests from trying to eat them. After 10 days of drying outside, I could hear the nuts rattling around in the shells.

After drying the peanuts outside, I let them sit in bowl indoors at room temperature for about a month. Today, I roasted half of them in their shells in a 350 degree F oven for 25 minutes on a cookie sheet. Then, I shelled them with my hands and ate them. They’re a great home grown snack. My peanut are similar in quality and taste to peanuts sold commercially.
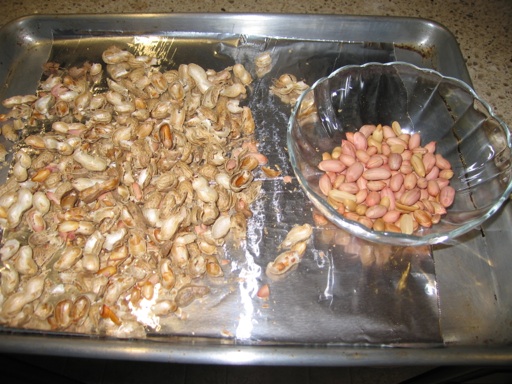
Overall, I am very happy with the results of my first crop of peanuts. One of my favorite things about them is that they seem to be nearly pest free. No critters even attempted to dig up my peanuts while they were growing. Although I’d imagine that gophers could potentially be a problem for peanut growers. Also, they required very little maintenance, other than regular watering. I didn’t fertilize our peanuts; although they probably would’ve grow larger and gotten more peanuts if I had. Also, the plants I grew were very compact in size and didn’t crowd out any of the plants nearby. So they were perfect for growing in a small raised bed. The only negative of growing peanuts for me is that it was a lot of work digging them up and searching for them in the dirt during harvest.
November 25 2013 | Peanuts | Comments Off on Nuts About Peanuts
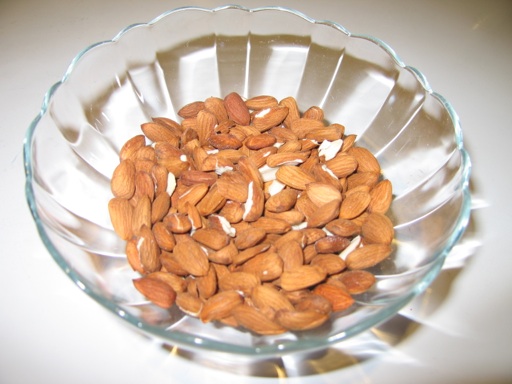
After letting the almonds that I harvested a few weeks ago dry in the sun for a week, I spent about an hour removing the shells from each of them. I hit each almond with a meat pounder to break the shells and then removed the almond nuts inside. The almond nuts were about half the size of almonds that are typically sold commercially. I then dry roasted our almonds in an oven on a cookie sheet (without any oil or salt) for about 30 minutes at 325 degrees F.
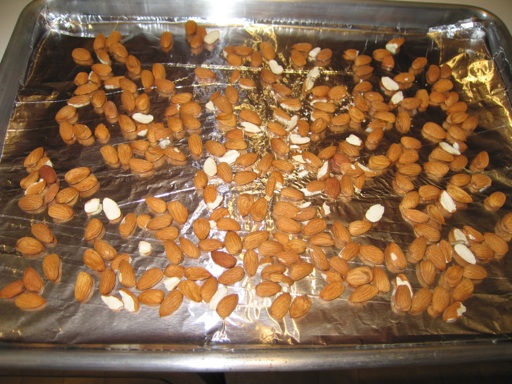
I am very impressed with the flavor of our home grown almonds. Our home grown almonds, although small, are much tastier than other almonds I have eaten in recent memory. Our home grown almonds have a great nutty flavor that lingers in the mouth. It’s a flavor that I don’t think I’ve ever tasted in almonds before. They are very flavorful even without salt or some other seasoning. Based on this first crop, I think that almonds are well worth growing at home, just to get to taste their full flavor. Although, it is a lot of work netting the tree, harvesting the almonds, hulling each almond, and then removing the shell from each almond.
I was concerned when I planted this tree that our summers would not be hot enough to get the almonds to ripen properly. But apparently, at least this variety (Garden Prince) produces great tasting almonds in a climate having warm summers, but not hot summers. Although, I doubt that any almonds would ripen properly close to the California coast where they would be exposed to fog and cold all summer. However, the foggy nights that we get in our area probably contributed to mold and mildew that formed on many of the almond shells. Fortunately, all of the almonds nuts inside the shells were completely free of mold and mildew.
October 03 2013 | Almond | Comments Off on Almond Update
« Prev - Next »