Archive for the 'Vegetables' Category
I have been growing broccoli in the late winter and spring for several years. Last February, I sowed broccoli seeds, and I planted broccoli transplants that I purchased from a nursery. I planted the nursery transplants directly into one of my raised beds in early Feb. I sowed the broccoli seeds in an outdoor pot filled with new potting soil in med-Feb. Contrary to what I said in a previous post several years ago, most of the broccoli seeds sprouted outdoors in about 2 weeks without difficulty in our relatively mild February weather. I then transplanted the seedlings from the pot into another raised bed in early March, about a week or 2 after sprouting. I mixed organic fertilizer (blood meal, worming castings, etc.) into the soil prior to planting the seedlings.
This year, the plants that I grew from seeds have grown bigger and produced larger crowns than the nursery transplants. The pictures below are some of the plants I grew directly from seed. These crowns are as large or larger than the typical broccoli crowns I see in grocery stores.
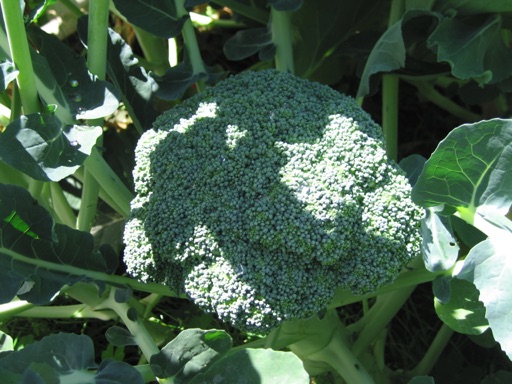
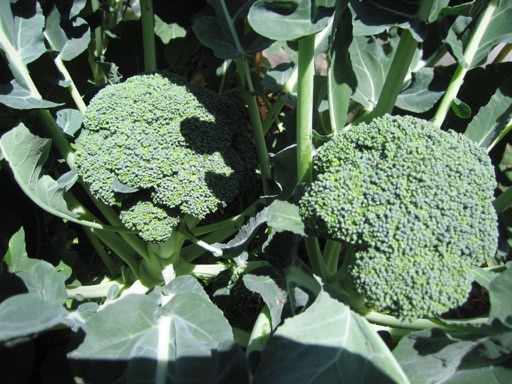
The nursery transplants produced small crowns in late April and early May. The plants that I grew directly from seed are mature now. In the past few years, they have continued to produce smaller crowns well into summer. Even though I planted too many of the seedlings too close together, the broccoli plants I grew by seed, including and crowns, have grown as large as ever.
I think the success of my broccoli by direct sowing can be at least partly explained by the fact that I was able to time the sowing of the seeds to cause the crowns to mature at the optimal time for our climate. Broccoli thrives in full sun and long days, which is why broccoli grows so large in southern Alaska during their growing season when days have 18 or more hours of sunlight. But broccoli does not thrive in heat. Its ideal growing temperature range is about 60-75F. Therefore, the ideal time for broccoli to mature is in late spring or early summer right before consistent hot weather (80 F+) sets in. In our climate, that time is late May to mid-June. Broccoli seeds should therefore be planted here in Mid-Feb. 90-100 days prior to the target harvest time.
Nursery transplants are often sold too early, at least for my area. Hot weather starts at different times of the year in our different local micro-climates. In areas that have many micro-climates, nurseries may not sell the transplants at the best time for all of the nearby micro-climates.
Another reason that nursery transplants may produce small crowns is if they are root bound. Broccoli plants that have become root bound in a pot have lost valuable growth time. Although they recover and continue to grow after being transplanted, they don’t have as much time to grow as large as they could. For these reasons, I have defaulted to sowing broccoli seeds rather than purchasing transplants. Even though it is more work, the reward has been worth it.
May 29 2018 | Broccoli | Comments Off on Spring Broccoli
I like to experiment with new vegetable varieties. Last year, I decided to grow cauliflower for the first time. White cauliflower is available in most grocery stores, so I thought it would be fun to grow purple cauliflower, which I have never seen in a grocery store.
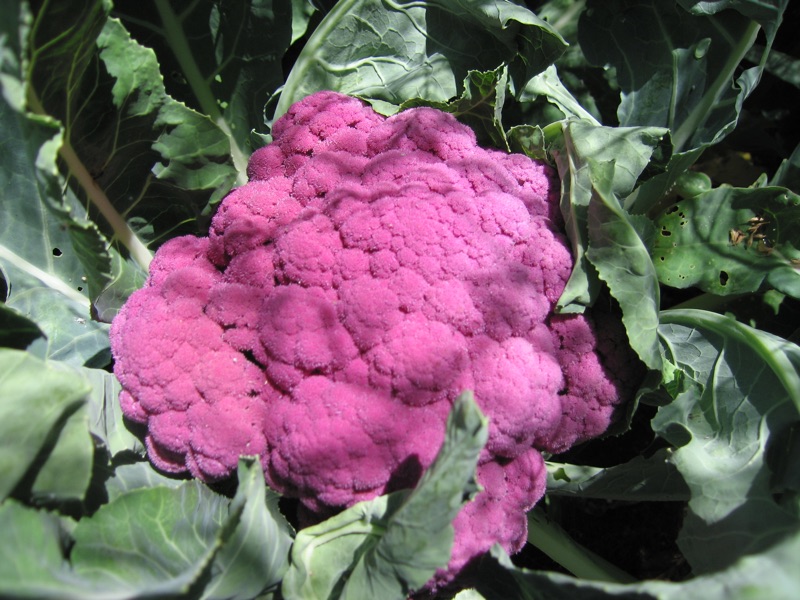
Last March, I purchased and planted seeds of two purple cauliflower varieties, Purple Of Sicily Cauliflower and Mulberry Cauliflower. After thinning and transplanting the seedlings, I grew about 6 plants of each variety. Both varieties grew into very large plants and produced large crowns of cauliflower, much bigger than typical broccoli crowns. After more than 4 months of growth, I harvested the cauliflower crowns in mid-July. The crowns of the Mulberry cauliflowers were very large and were a beautiful, bright purple color. One of these is shown in the picture below.
Unfortunately, both varieties of cauliflower got attacked by aphids, even though I had most of them covered with mosquito netting. They managed to get under the netting, because it wasn’t tightly secure around the beds. The Purple of Sicily cauliflower crowns were nearly covered with aphids. Although still edible, most of the crowns were not appetizing to eat.
Some of the Mulberry cauliflower crowns were mostly aphid free. I roasted them in the oven, because I really enjoy the taste of roasted white cauliflower. However, even after 30 minutes of roasting at 375 degrees, the crowns were still tough, chewy, and not appetizing, even though they had browned at the tips. They were nothing like roasted white cauliflower, which I have cooked many times. I still don’t know what went wrong with the consistency of the purple cauliflower being so tough. One theory I have is that I harvested them too late. They might have been more tender a few weeks earlier when the crowns were smaller. Other possibilities are that the heat of summer or failing to cover the crowns with the leaves (blanching) made them tough. Many sources assert that cauliflower is best in the fall.
March 14 2018 | Cauliflower | Comments Off on Purple Cauliflower
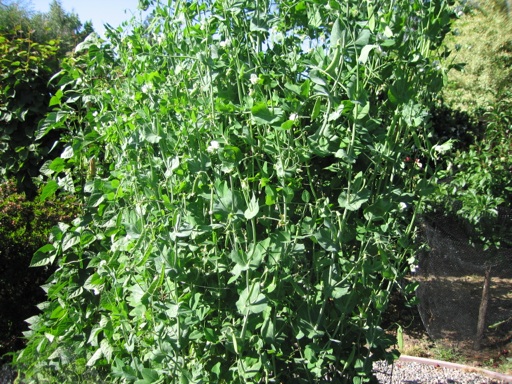
On March 1st of this year, I planted sugar snap pea seeds in one of our raised beds next to a wire trellis. All of the seeds sprouted within a week or two and grew rapidly after that. The pea vines are now over 6 feet tall (taller than the trellis) and are still growing. There are so many vines (I planted too many seeds) that wind blew them forward off the trellis a few weeks ago. I tied them back onto the trellis with string. I planted three rows of seeds at about a 3 inch spacing. Next time, I will plant only two rows of seeds spaced farther apart.

I am growing peas on the same trellis as blue lake green beans, which I have been growing for years. When I have planted green beans along the entire 6 foot long trellis in the past, the plants produced way too many beans to eat. So this year I planted half as many beans and planted peas next to the beans. The peas are out growing the beans and starting to crowd them.
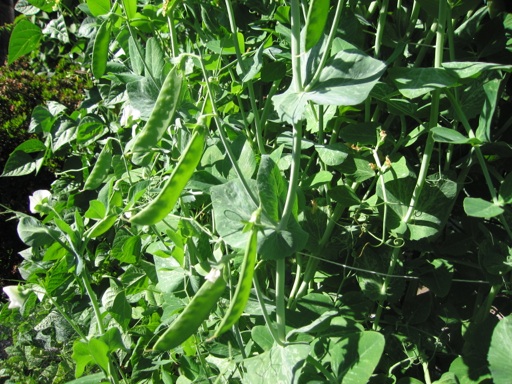
Our peas are now full of pods. I just began picking them last week. This is the first time I have grown peas, and I am wondering why I didn’t before. They are easy to grow, produce lots of sweet edible pea pods early in the growing season, and are good sources of vitamins A and K and especially vitamin C.
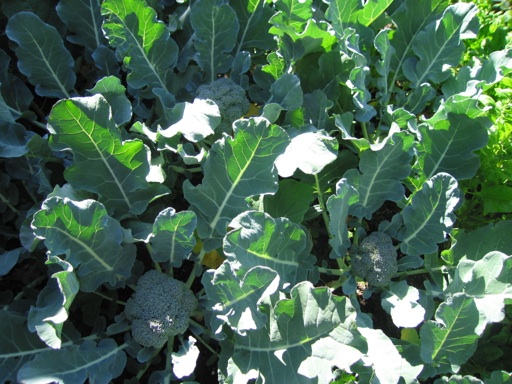
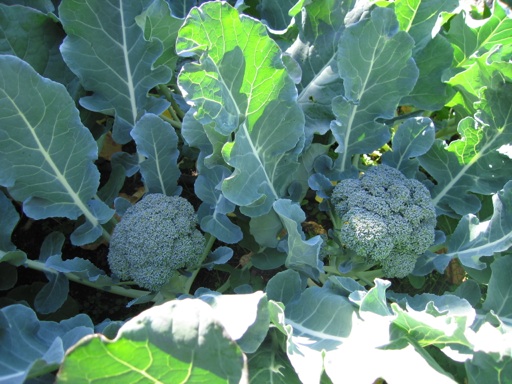
Our broccoli plants are large this year. I grew them by seed rather than buying nursery transplants, as I mentioned in a previous post. I have watered them regularly and applied water soluble fertilizer to them about once a week, which seems to have made a difference. Although right now, the plants are growing together and crowding each other out, which is probably limiting the size of the plants and the crowns. Next time, I may space them farther apart. 12 inches apart is not quite enough for maximum growth. Planting of broccoli seeds at just the right time is critical to getting large crowns. I think I got the timing right. Although, we’ve had two heat waves this month into the low 90s F, which is not ideal for broccoli growth. Our broccoli plants are forming crowns now. I just harvested the first crown today. These crowns in the lower photo look nearly ready to cut.
I also covered our broccoli plants with two layers of bird netting which helped to keep the snails away (they get stuck in it) and these white moths that want to lay larvae (worms) on the broccoli. The moths also can’t get through the netting.
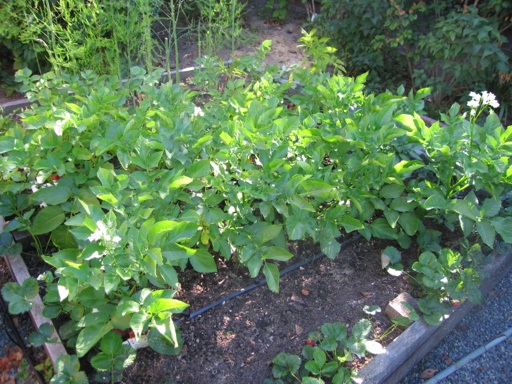
I have had mixed results with potatoes this year. I planted russet and yukon gold potatoes in Feb. and March. I have been planting potatoes in the same raised bed for years. Those potato plants (above photo) have not grown nearly as much as the potato plants that are growing in a different raised bed (below photo with corn in the back) where I had never planted potatoes until this year. It seems to be an example of the importance of rotating crops from year to year.
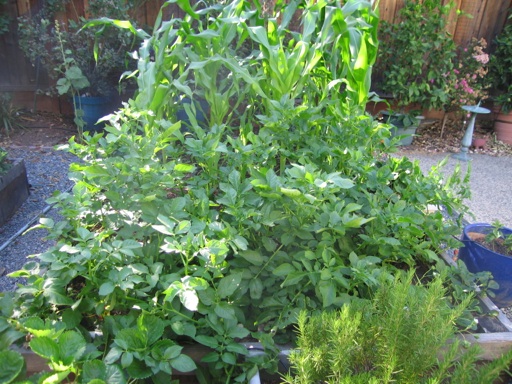
I sowed the corn seeds in mid-March, which is the earliest I have ever planted it. I sowed Peaches and Cream corn seeds, which is my favorite variety for taste. The seeds sprouted and grew about as quickly as in past years when I had always sowed the seeds in April. I am expecting to harvest corn by July 1, and then rip out these plants for a second planting of corn seeds to be harvested in late October. Home grown corn is so good, one harvest a year just isn’t enough!
May 21 2014 | Broccoli and Corn and Peas and Potatoes | Comments Off on Cool Season Crops
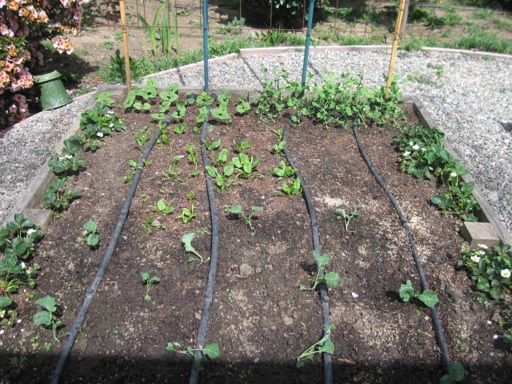
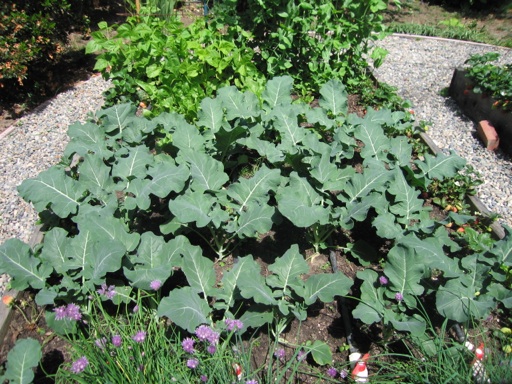
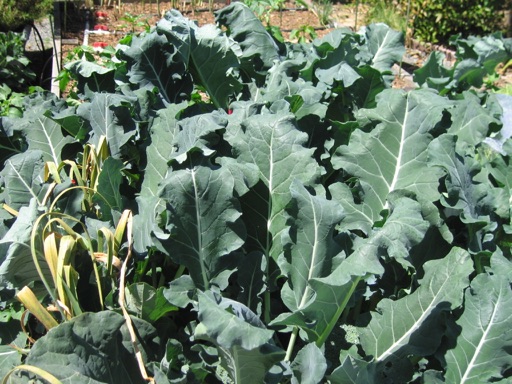
I planted broccoli seeds in peat pots the last week of February this year. I germinated them in our new portable greenhouse. I transplanted the seedlings into raised beds a few weeks later. The first picture above was taken in late March after I transplanted the seedlings. They have now grown into plants that are over a foot tall. The second picture of the same plants was taken a week ago. There is still no sign of any crowns developing yet. Although, I except them to develop crowns by the end of May. Hopefully, the plants will be big enough by then to support large broccoli crowns.
An important point regarding growing broccoli is timing the plantings so that most of the plants’ growth occurs when the high temperatures are between about 62 and 75 degrees F, which is their ideal temperature range. You have to have a good idea of the average spring temperatures in your area and time the plantings appropriately. This is the first time I have planted broccoli by seed. Previously, I planted transplants that I bought from a local nursery, which were typically available mid to late March. Those previously broccoli plantings developed crowns in late May and early June. I based my timing of planting the seeds in late Feb. to try to duplicate this timing. I am assuming about 90 days between planting the seeds and harvest time.
May 04 2014 | Broccoli | Comments Off on Broccoli By Seed
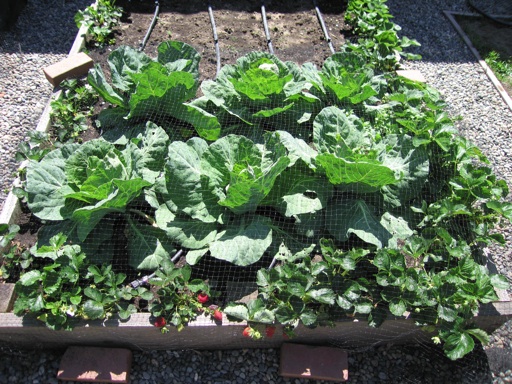
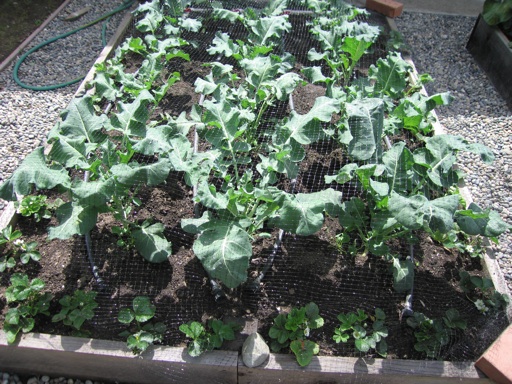
The first vegetables I planted for 2013 were two cool weather crops: cabbage (first picture) and broccoli (second picture). I planted transplants that I bought from a nursery in late February, rather than starting them by seed. Most seeds wouldn’t sprout in winter here, because it’s not warm enough. I would have had to start by seed indoors and then transplant the seedlings outdoors in late winter. Buying and planting nursery transplants is easier. No hardening off is required.
One year, I planted broccoli seeds in one of our backyard raised garden beds in July for a fall crop. However, the broccoli wasn’t mature enough by late fall, so it overwintered and matured in February. The broccoli crowns were very small, probably because the temperature was too cool that time of year for ideal growth. Next time, I would plant broccoli seeds outdoors in June for a fall harvest.
Our cabbage is nearly ready to harvest. This is my first time growing cabbage. From what I have read, it can be harvested as soon as a cabbage head forms. It was very easy to grow. I watered two to three times a week and fertilized weekly with water soluble fertilizer. I planted a dwarf variety that matures in about 60 days after setting out transplants. I also put bird netting over them, mainly to keep the snails away. I have found that bird netting is more effective than snail bait, which dissolves in about 2 weeks. I discovered that when I used bird netting to keep the birds away from my strawberries (which are growing around the beds as a border) that snails would get caught in it. They have a hard time crawling through the holes in the netting and usually get stuck in it, so they can’t make it into the beds.
I planted Waltham Broccoli. The Waltham broccoli produced very small crowns in early April, only about an inch or 2 wide (front plants in second picture). I’ve learned that in order to get large crowns, broccoli plants need to grow very large first. If the plants generate crowns when they are still medium size, the crowns will be too small.
I’ve planted broccoli several times before, and I’ve only had success in getting them to produce large crowns once. That time, I planted in mid-March and harvested crowns in early June. Apparently, proper timing of your broccoli plantings is key to success. They were growing in the same bed as the ones in the above photos.
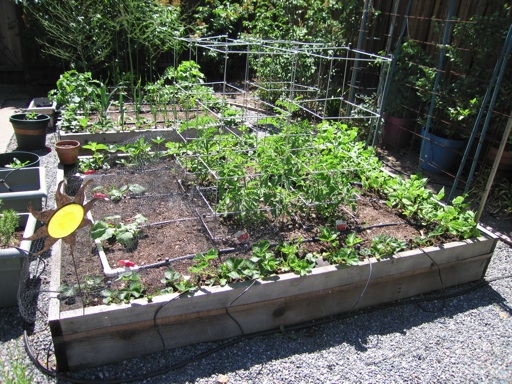
I set out tomato transplants in mid-March. I also planted pole bean seeds and zucchini seeds in the same bed (third picture). All of these are growing well, as are our strawberries around the edges of the beds. I set out tomato transplants that I buy from a nursery rather than staring by seed outdoors to get a head start on the growing season. Each year for the past four years that I have planted tomato transplants in the garden in March, I have had our first ripe tomatoes in early July. I also have tomato seedlings growing in the same bed. They are growing where tomatoes fell off the vine and rotted last year. But these seedlings are tiny compared to the nursery transplants and are getting crowded out by them.
April 20 2013 | Broccoli and Cabbage | Comments Off on Spring Vegetables
Next »